How to Can Pepper Relish: A water bath canning tutorial for beginners

How to Can Pepper Relish

One way to really get the most out of your food budget is by buying in season and in bulk, or by growing your own veggies in a home or community garden.  But how many peppers can a family reasonably eat at once?! Enter canning: the art and science of preserving food in jars. It isn’t as scary as it sounds and it’s simply one step beyond cooking.  Once you get past the initial anxiety, I think you’ll actually enjoy it- and feel like a real crunchy baddie. In this water bath canning tutorial for beginners, I’m going to walk you through step by step one of the easiest starter recipes, How to Can Pepper Relish.

Sadly, having my own garden isn’t possible in our apartment, which is one reason we subscribe to a CSA.  (Community supported agriculture is a program in which families can buy a “share” of a local farm’s harvest.) For me, this is the next best thing to having my own garden! I can still be connected to my food and invested in local agriculture.  But occasionally, when I want to put away more of some seasonal goodies than what we receive in our farm basket, we head over to the farmer’s market!

Picking Peppers for Pepper Relish

Picking peppers

Besides being a frugal move, shopping local and in season at the farmer’s market gives my kids a real sense of where food comes from.  The colorful harvest heaped into baskets and wooden boxes, the seasonal flowers, and wreaths, the smell of fresh baked breads and pastries… there is truly nothing more stimulating to all the senses than walking into a bustling market on a crisp Saturday morning.  

Today’s mission: peppers!  At 5/$1 organic jalapeños are perfect.  And we grabbed a few colorful bell peppers for the mix because I like my relish on the mild side.  Also they look beautiful in the jars.

Picking Peppers for Pepper Relish

Pioneer dreams

When we moved to the pnw from nyc, I was on a mission to create a new homestead-y life (in my small apartment with no yard) and learning to can and preserve food felt like a must have new skill.  

It was terrifying! I was afraid that I would poison my family or royally mess up with cracked jars and wasted food.  But, as it turns out, none of those things has ever happened (knock on wood) and I’ve been canning a few years now. I didn’t have anyone to come over and teach me, but I had the internet, a bucket of blackberries and a basic canning tools kit we grabbed from the grocery store!  If I can do this, so can you! Let me walk you through it.

So what is water bath canning?

Basically, it’s boiling jars of high acid food in order to kill off bacteria, mold, and anything icky.  It also forces the air out of the jar creating a vacuum, which both extracts oxygen and creates a vacuum seal.  Because the boiling water can only heat food to 212 F/100 C, it’s safe for high acid foods like relishes, pickles, fruits, and tomatoes (which require a bit of bottled lemon juice to ensure proper PH). All other vegetables and meats, low acid foods, need to be processed in a pressure canner which can get hotter.  Water bath or boiling water canning is safe and effective!

It seems like many people start canning with jam, like I did. And while the canning part of jamming is simple, the making jam part is its own skill.  Which in my opinion makes it a tricky project to start with.  The first time I made this pepper relish, I thought THIS is where I should have started!  If you can chop and you can boil, you have all the required skills to give this a whirl.

This recipe is adapted from the Ball Complete Book of Home Preserving, basically my canning bible, Hot Pepper Pickles.  Listen up: always, ALWAYS, use trusted, tested canning recipes! This isn’t like cooking where you can wing it or just make it up.  While there is some room for adapting recipes to your tastes and creativity, food safety is essential here and many of the steps and ingredients insure food is properly heated and sufficiently acidic.  

Utensils for Canning Pepper Relish

The gear

Here’s what you will need to get started with water bath canning.  Keep in mind that many of these are one time expenses and you will use them for years to come.

Required Equipment:

Glass mason-style canning jars with bands and new lids. For this recipe we will use about 10 half pint (8 oz) jars.  Lids should only be used once, but you can buy replacement lids, and jars, too, at most grocery stores, Target, Amazon, etc.

A water bath canner or a very large pot in which to “process” or boil the jars.  Canning pots are inexpensive and useful, but if you have a huge pot with a lid this could work provided the jars fit inside without touching and you can fill it with water to about an inch above the jars.

A rack that fits in the bottom of your pot.  A water bath canner will come with one. If you don’t have a rack, you can create one by setting extra jar bands on the bottom of the pot.

Tongs to lift the jars from the hot pot

A wooden or plastic chopstick or a bubbling tool

Optional but useful:

A canning kit- while you can probably get by without these canning utensils, your life will be easier with them.

Ingredients for Pepper Relish

The ingredients

About 3-1/2 to 4 lbs of fresh peppers, any variety.  I like to use a mix of hot and sweet peppers, but here is a place you can make this your own.  Use all spicy if you want it to really pack a punch. I used a third mild and two thirds spicy.

3 cloves of garlic, peeled and smashed

6 cups of white distilled vinegar

2 cups of water

Note: If you don’t have this many peppers, feel free to scale this recipe back (or up)!  The brine makes a generous amount of liquid, so you should have enough even if you end up with more jars. Or you can always scale the brine quantity back, maintaining the original ratio of vinegar to water in order to insure food safety.  

The procedure

Prepare the jars, lids, and bands.  Wash them in warm soapy water and rinse well.  (You can run jars through the dishwasher.)  I always prepare one or two more jars than I think I will need, just in case the yield is more than expected.  Give the jars a good once over to check for any chips or cracks. This could cause breakage, a sad, sad fate.

This is a water bath canner

Place a rack in the bottom of your pot or use extra canning rings in a layer at the bottom to create a rack.  Put in your empty jars and fill ‘er up with water to about an inch above the jars. Turn the heat on and start warming it up- it’s gonna take a while.  If the water starts to boil, turn down the heat- it’s best not to boil the empty jars.

Meanwhile, wash, seed, and finely chop all the peppers.  I recommend wearing gloves! I have very sensitive ginger person skin and I can even feel the pepper burning through my gloves sometimes.  Although it is possible to use a food processor for this, I do it by hand to build character. Just kidding. I just think the food processor creates too fine a dice.  I like the pepper pieces a bit larger.

Making Brine for Pepper Relish

Make the brine.  Add smashed garlic, vinegar, and water to a stainless steel pot and bring to a gentle boil for 5 minutes.  (Turn the pot down to simmer to keep warm until you are ready to use it.)

Now we are ready to pack our jars!  Taking out one or two hot jars at a time, pack the jars with chopped pepper mix leaving about a half inch space at the top.  Your tool kit will come with a headspace checker or you can use a little ruler. I have a wooden chopstick I like to use that we made a notch in to measure the space.  Using a ladle, fill the jars with hot brine maintaining the half inch of headspace at the top. If you have a canning funnel, it’s handy to reduce spills. With your non-metal chopstick or bubble tool, gently slide down the side of the jar between the food and the glass to release air bubbles.  Do this a few times around the jar. Sometimes this creates a bit of extra space so double check your headspace one more time. 

How to release bubbles from jars

With a clean damp cloth, wipe the rim of the jar to make sure no bits of food are hanging out and place a fresh lid on top.  (Ball used to recommend warming the lids before placing them on the jars.  BUT I’ve just learned that we no longer need to do this!  They have determined that it doesn’t improve the seal.)   

Pepper Relish Jars in Canner

Screw down the band to fingertip tight. As in not crazy tight, just on securely. Using tongs, carefully lower your jar into the hot water taking care not to tip it over . Repeat this process until all jars are filled and in their cozy bath.

Now you’re ready to process!  Double check your water level in the canner to make sure there is an inch or two above the jars.  Pop on the lid and bring it to a boil. When you’ve got a good boil going, then you can start your timer for 10 minutes.  With the lid on, just let science do its thing.  If for any reason the water stops boiling, crank the heat back up and begin the process time again.  

(If you live at an altitude above 1000 ft, please check this chart to make adjustments to the process time.)

After 10 minutes, cut the heat and carefully lift the lid.  Now WAIT 5 minutes. We gotta give these bad boys a chance to cool off just a touch so we don’t shock them and risk breakage from the temperature jump.  Then, carefully lift them straight up with your jar tongs and set them on a dish towel to cool.  (This also helps control the temperature.)  Make sure you put them where they can sit undisturbed for 12-24 hours.  Resist the urge to touch them or move them as the wax seal needs time to set!  

Taking Jars Out of Canner
Placing Pepper Relish Jars on the Counter

Now here comes my favorite part.  The lids will start to “pop”!  It’s unbelievably satisfying and it means it worked!  

The next day, after you’ve had enough time to beam with pride every time you pass your army of preserved relish on the counter, check the lids for proper seal.  Unscrew the bands and gently lift the lids with your fingers. A properly sealed lid will not lift off or budge. If you find that any jars didn’t seal, it’s no big deal.  You can either stick that one in the fridge and eat it first, or get a new lid and reprocess the jar. The food is still perfectly safe.  

Label your jars and use within 18 months for best quality!  Jars are best stored without the bands on and stacked no more than two high.  

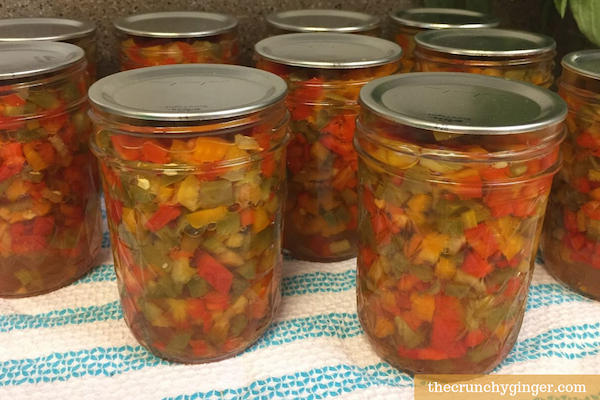
Yield: about 10 half pint (8 oz) jars

How to Can Pepper Relish

Pepper Relish Jars

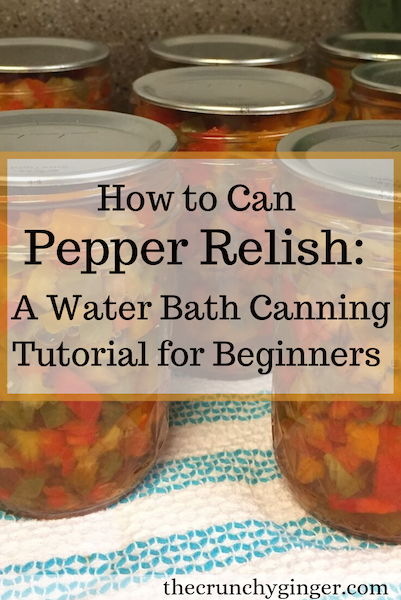
The most delicious pickled pepper relish! Using a mix of spicy and sweet fresh peppers, make it your own and use it all year round. A perfect water bath canning recipe for beginners.

Prep Time 30 minutes
Cook Time 10 minutes
Additional Time 1 day
Total Time 1 day 40 minutes

Ingredients

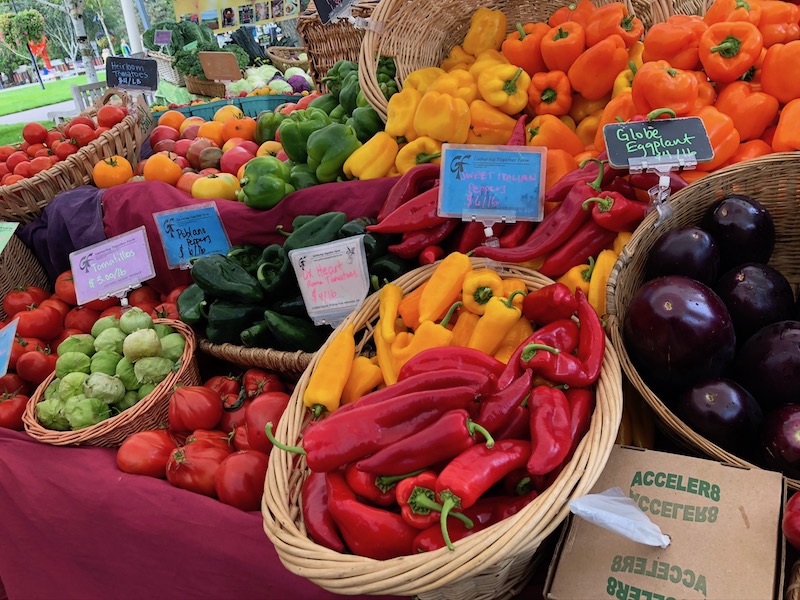
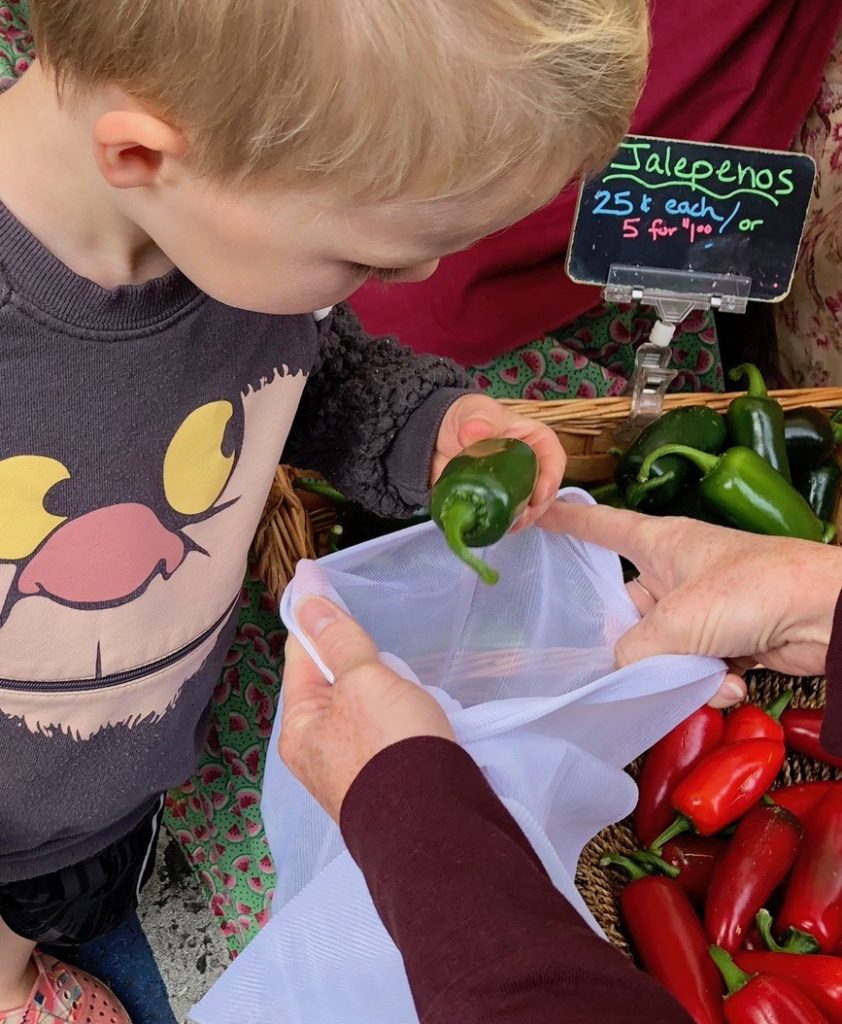
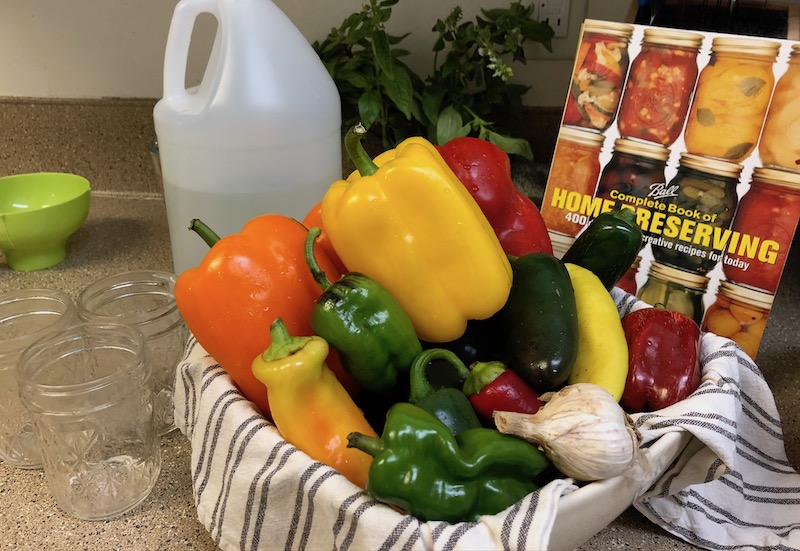
  • about 3 1/2 -4 lbs of fresh peppers (spicy or a mix of mild and spicy)
  • 3 cloves of garlic, peeled and crushed
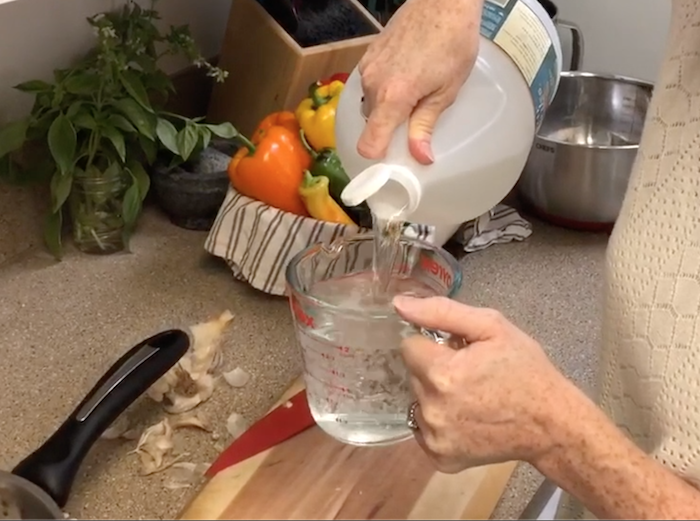
  • 6 cups white vinegar
  • 2 cups water

Instructions

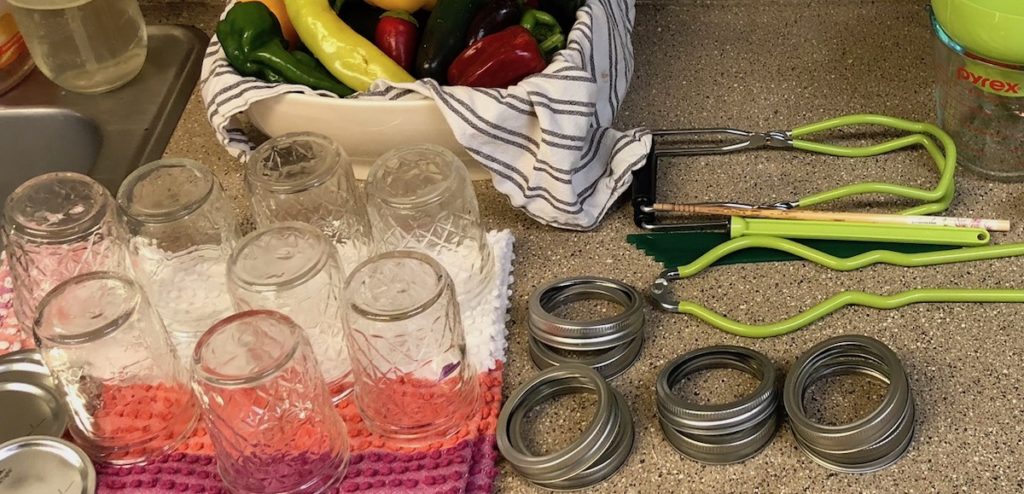
    1. Prepare Mason-style half pint jars, bands, and new lids by washing in warm soapy water, checking for any chips or cracks.
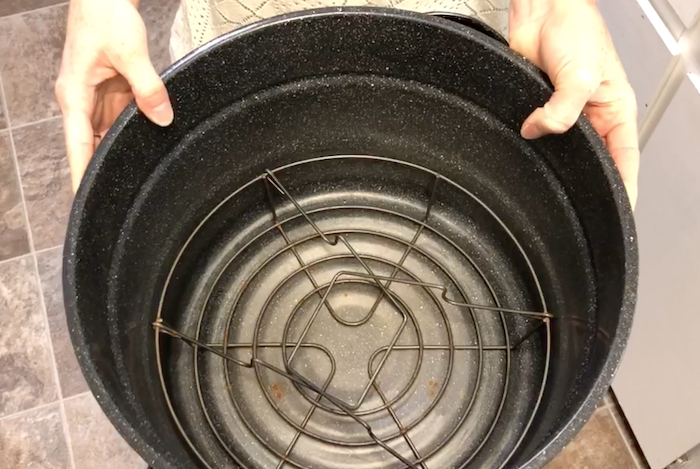
    2. Place rack in the bottom of water bath canner and fill with enough water to cover jars by about 1 – 2 inches. Place empty jars in and begin to heat the pot to warm the jars. (If the water starts to boil, turn down heat- do not to boil the empty jars.)
    3. Meanwhile, wash, seed, and finely chop all the peppers.  I recommend wearing gloves!
    4. Make the brine.  Add smashed garlic, vinegar, and water to a stainless steel pot and bring to a gentle boil for 5 minutes.
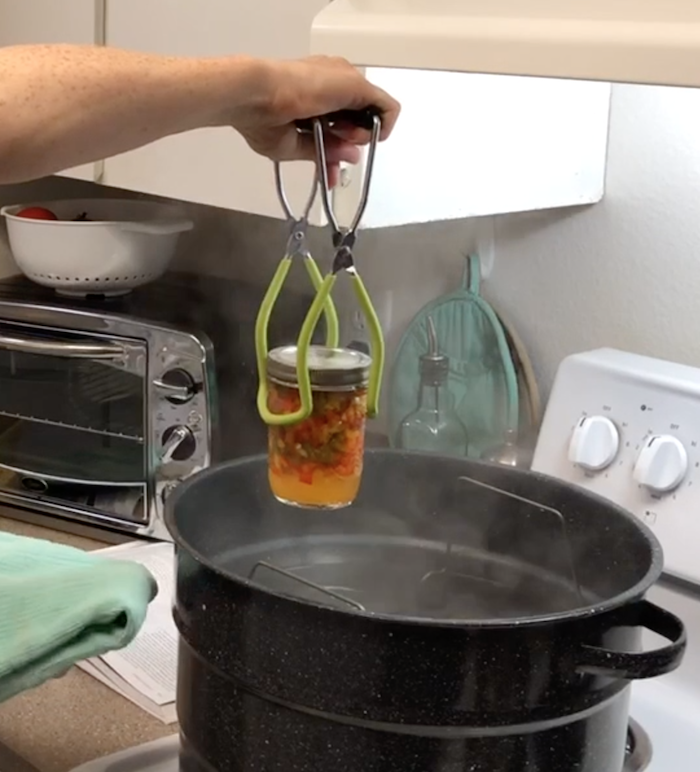
    5. Working with one or two hot jars at a time, lift the jars out of the pot. Pack the jars with chopped pepper mix leaving a half inch head space at the top. Using a ladle, fill the jars with hot brine, maintaining the half inch of headspace. With a non-metal chopstick or bubble tool, gently slide down the side of the jar between the food and the glass to release air bubbles.  Do this a few times around the jar. Sometimes this creates a bit of extra space so double check your headspace one more time.
    6. With a clean damp cloth, wipe the jar rim and place a fresh lid on top.  Screw down the band to “fingertip tight”. Using tongs, carefully lower the jar into the hot water taking care not to tip it over . Repeat this process until all jars are filled and in the canner.
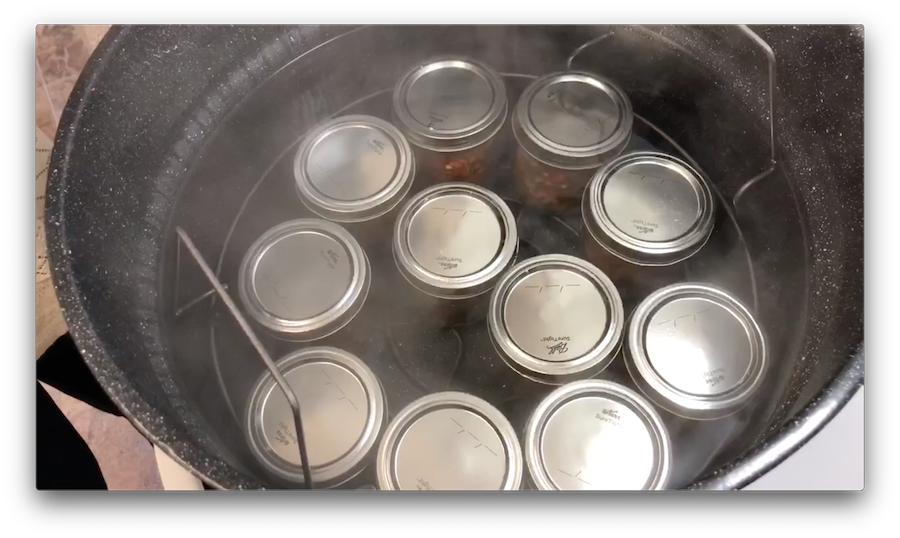
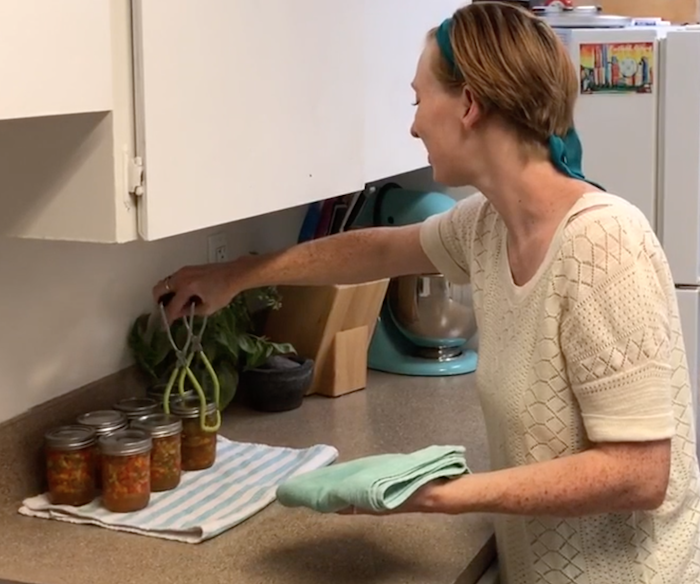
    7. Double check your water level to make sure there is still an inch or two above the jars.  Place the lid on the pot and bring it to a boil. When the water is boiling, begin the process time of 10 minutes. Turn off the heat, carefully lift the lid, and wait 5 minutes to allow jars to “rest.” Then, carefully lift them straight up with your jar tongs and set them on a dish towel to cool undisturbed for 12-24 hours.  Resist the urge to touch them or move them as the wax seal needs time to set!
    8. Check for proper seal.  Unscrew the bands and gently lift the lids with your fingers.  A properly sealed lid will not lift off or budge. (Place any unsealed jars in the fridge and consume them first, or get a new lid and reprocess the jar.)
    9. Label your jars and use within 18 months for best quality!  Jars are best stored without the bands on and stacked no more than two high. 

Notes

This recipe was adapted from Ball Hot Pepper Pickles.

If you live at an altitude above 1000 ft, please check this chart to make adjustments to the process time.

If you don’t have 3 1/2 pounds of peppers, feel free to scale this recipe back (or up)! The brine makes a generous amount of liquid even if you end up with a few more jars. Or you can always scale the brine quantity back, maintaining the original ratio of vinegar to water in order to insure food safety.

Nutrition Information:

Serving Size:

1 Tablespoon

Amount Per Serving: Calories: about 4

Nutrition information isn't always accurate.

Give it a shot and let me know if you have any questions! I will do my best to help you figure it out.  Check out my video tutorial for extra credit!

8 thoughts on “How to Can Pepper Relish: A water bath canning tutorial for beginners”

  1. Pingback: Instant Ramen Soup in a Jar • The Crunchy Ginger

  2. I LOVE YOU, I have been looking for a recipe for pepper relish without sugar, I dont get why everyone adds so much sugar. THANK YOU SO MUCH

  3. Claudia Phillips

    Thanks for the detailed article. I have never canned anything, but I just might have the confidence after reading your explanation.

Leave a Comment

Your email address will not be published. Required fields are marked *

Skip to Recipe