Calming Lotion Bars

Stack of calming lotion bars

This post contains affiliate links.  As an Amazon Associate I earn from qualifying purchases.  This means if you make a purchase from a link on my site, I may earn a commission at no extra cost to you.  I will never recommend a product or service that I do not personally use or like.

One of my favorite things about the holidays is creating handmade gifts.  There is something deeply satisfying about pouring thought and creativity into personalized projects at the craziest, busiest time of year.  It feeds my soul and gives me a chance to think about the person I am crafting for.  It also enables me to give something nicer and more personal than I could otherwise afford.  I believe that whatever your skill level, there are diy projects you can totally ace!  This is one of them: calming lotion bars.

Huh? What's a Lotion Bar?

These elegant and versatile gems are solid bars of moisturizing magic.  They look like a fancy bar of soap but when you rub them between your hands, the perfect amount of oil melts into your skin.  The best part about them is that they are endlessly customizable, making them perfect for yourself and anyone on your list.

Lotion bar ingredients

What’s in a Calming Lotion Bar?

This “recipe”, if you can even call it that, couldn’t be simpler.

These are some of my favorite raw ingredients and they work together here to provide a deeply moisturizing and toxin free product.  Check out this post for a bit more in depth discussion of these ingredients.  For this version, I have chosen an essential oil blend called Gray Matter Batter to help promote calm and relaxation.  It’s a lovely blend of peppermint, lavender, spearmint, and chamomile.  If you want to keep it simple, or if you are making it for someone for whom these oils are not appropriate, lavender essential oil could be a good choice.  (Peppermint is not generally recommended for small children and some pregnant and nursing women.  Here is a great article with a bit more information.)  But you can use any fragrance you want or none at all!  

I recommend sticking to about a 1% dilution or less.  This works out to 6 drops per fluid ounce.  For example, in my video tutorial, I am using 2 ounces each of my ingredients, 6 ounces total.  So I used 30 drops of essential oil.  Here is a helpful chart to help you work it out for your amounts.

What Else Do I Need?

You very likely already have everything else you need to make these beautiful calming lotion bars.

  • A small heatproof bowl and a saucepan (or a double boiler)
  • A stirring utensil
  • A mold of some kind

The mold can be something as simple as a muffin tin.  Silicone baking or candy molds would be great, too.  The one I have is marketed for soap making and I got it at Michael’s for a few dollars.  This is another place where you can really personalize your lotion bars.  You can make flowers or stars or squares or skulls…

How to Make Calming Lotion Bars

  • Start by measuring equal parts shea butter, coconut oil, and beeswax.  I prefer to measure my ingredients using a small kitchen scale.  Trying to scoop these sticky oils and butters into measuring cups can be a little annoying, but it is totally doable.
Combine Ingredients
  • Combine ingredients in a small heatproof bowl and place on top of a saucepan with an inch or two of water.  Heat on the stove at medium-low.
  • Stir until oils and wax are completely melted and combined. 
  • Remove from heat and allow to cool just slightly before adding essential oils, if using.  Stir to incorporate.
Pour into Molds
  • Working quickly, pour the liquid mixture into your clean molds. 
  • Allow them to sit undisturbed until the mixture has started to become opaque.  Now either leave them overnight to completely harden, or pop them in the fridge for an hour or two if you are in a hurry.  (Or if you are just impatient like me!)
  • Carefully pop the bars out of the mold and voilà!  A unique, luxurious gift you can be proud to give!  

Troubleshooting 

This recipe is pretty forgiving and a great beginner project.  If for some reason you don’t get the melted oils in the mold fast enough and it starts to turn solid, just set the bowl back on the heat for a moment to re-liquify.  Or if you have tried to pop the bars from the mold too soon or they got a little wonky for some other reason, simply melt them down again and repour.   Just be sure not to melt too aggressively if you have already added your essential oils- they don’t like high heat. 

Calming Lotion Bars

Why Lotion Bars Make Great Gifts

Anything you buy at the store with ingredients like unrefined shea butter or organic beeswax will come with an upgraded price tag.  But by making them yourself with bulk ingredients, the price per bar becomes completely manageable and significantly less expensive than store bought products.  This is why when I decide on a handmade gift project for the season, I try to make it for many people.  One 16 ounce bag of shea butter could be used to make 32 bars in my mold!

Lotion bars are also unusual.  While basically every retailer on the planet sells bottles of hand creams,  lotion bars are harder to come by which makes them inherently special!  Plus they travel well.  No liquids to spill in your suitcase or deal with at TSA check in.

And of course, they are deeply moisturizing, all natural, and completely customizable!  These calming lotion bars are perfect for the holiday season when everyone’s hands are begging for some TLC.  But, they are welcome anytime of year!  I made a springy lime scented version a year or so ago for Mother’s Day and sent them to folks in the sweltering Southern US.  No one reported that they got super melty.  The beeswax stabilizes the bar and keeps it solid, even when it’s a bit warm.

Lotion Bar Packaging

Ribbons and Boxes and Bows

Now, if you aren’t careful, the packaging for your handmade gift can get as pricey as the product itself.  But you also probably don’t want to just hand someone a naked bar of lotion.  Here are a few of my favorite ways to wrap these guys up at varying price points.

To start, cut squares of parchment or wax paper and fold around the bars to protect them.  If you want to, you can secure with a pretty sticker or piece of washi tape.

  • These look pretty fancy in a small metal tin labeled with a decorative sticker or gift tag.  These kinds of boxes are easy to find online in different shapes and sizes.  Make sure to measure your finished wrapped bars to figure out what size tin you need.  
  •  For a less expensive option, wrap the bars as above and tuck them inside a small decorative paper gift box.  I found the ones in the photo on super sale at Michael’s, but again they come in all shapes and sizes.
  • If you don’t want to deal with containers at all, try tying the wrapped bar up in a piece of tulle, scrap cloth, or tissue paper with a festive ribbon, twine, or piece of yarn.

Include a little tag or note with the ingredients and basic instructions for use.  Something like…

Made with love and:
unrefined shea butter
organic virgin coconut oil
organic beeswax
peppermint, lavender, spearmint, and Roman chamomile essential oils 

To use: Rub lotion bar between hands.  Breathe deeply.

I think you are really going to love these calming lotion bars!  Let me know if you make them and share your favorite way to package them up!  Be sure to check out the video tutorial and stop by next week for more simple handmade gift ideas for everyone on your list.

Yield: varies

Calming Lotion Bars

Calming Lotion Bars for Blog

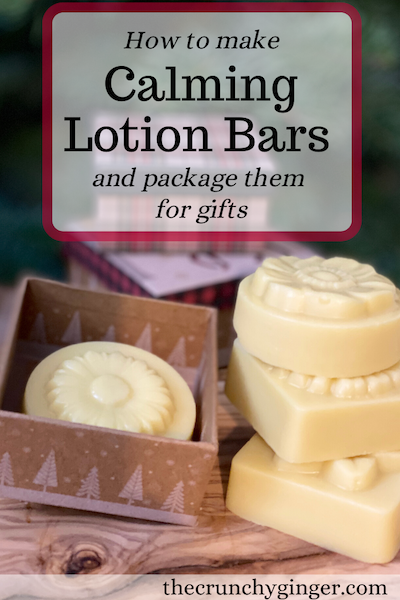
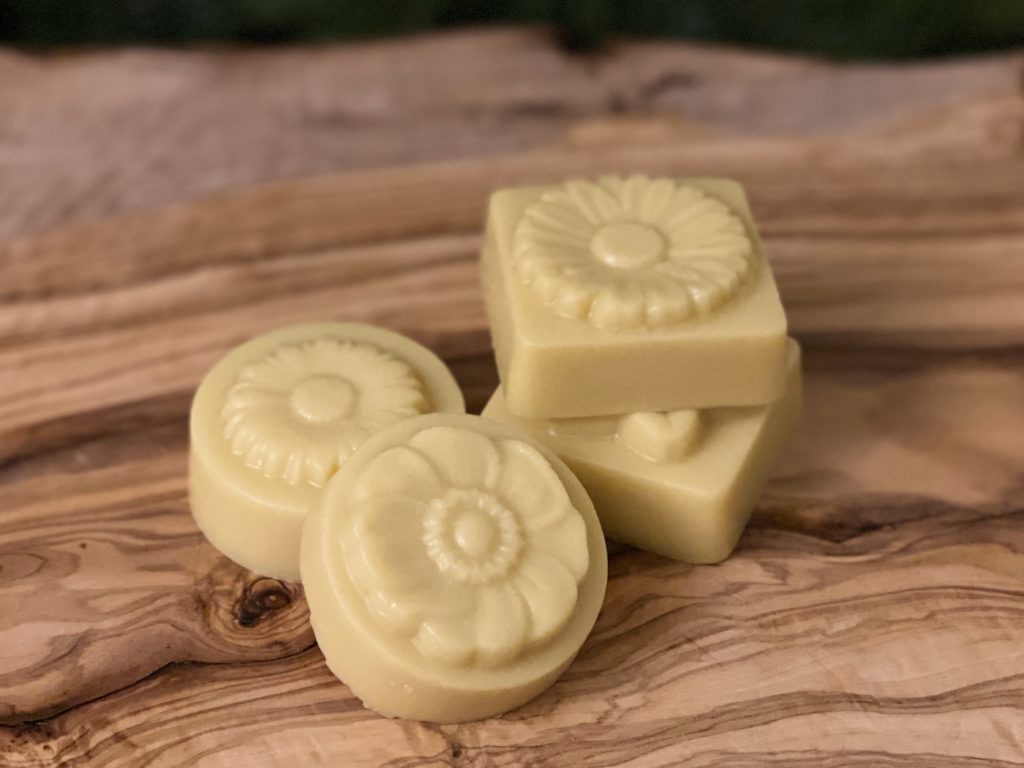
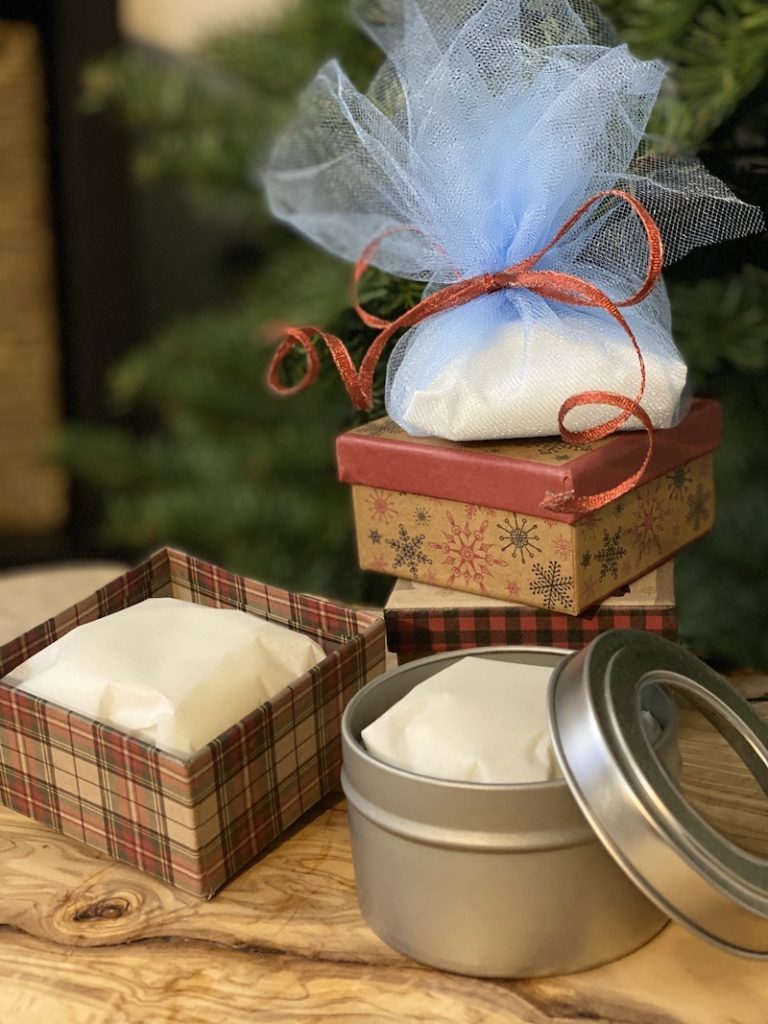
These calming lotion bars are moisturizing magic.  Quick, easy, and endlessly customizable, they are the perfect homemade gift for anyone on your list.

Prep Time 5 minutes
Active Time 10 minutes
Additional Time 2 hours
Total Time 2 hours 15 minutes
Difficulty easy

Materials

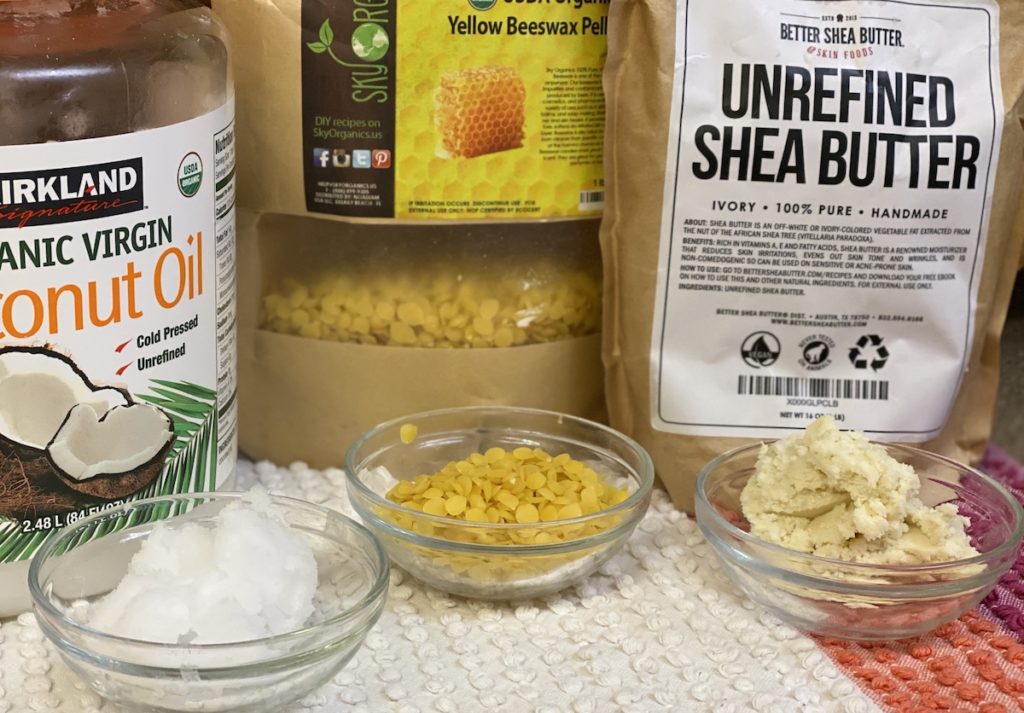
  • 1 part shea butter (or cocoa butter)
  • 1 part coconut oil (or other carrier oil)
  • 1 part beeswax 
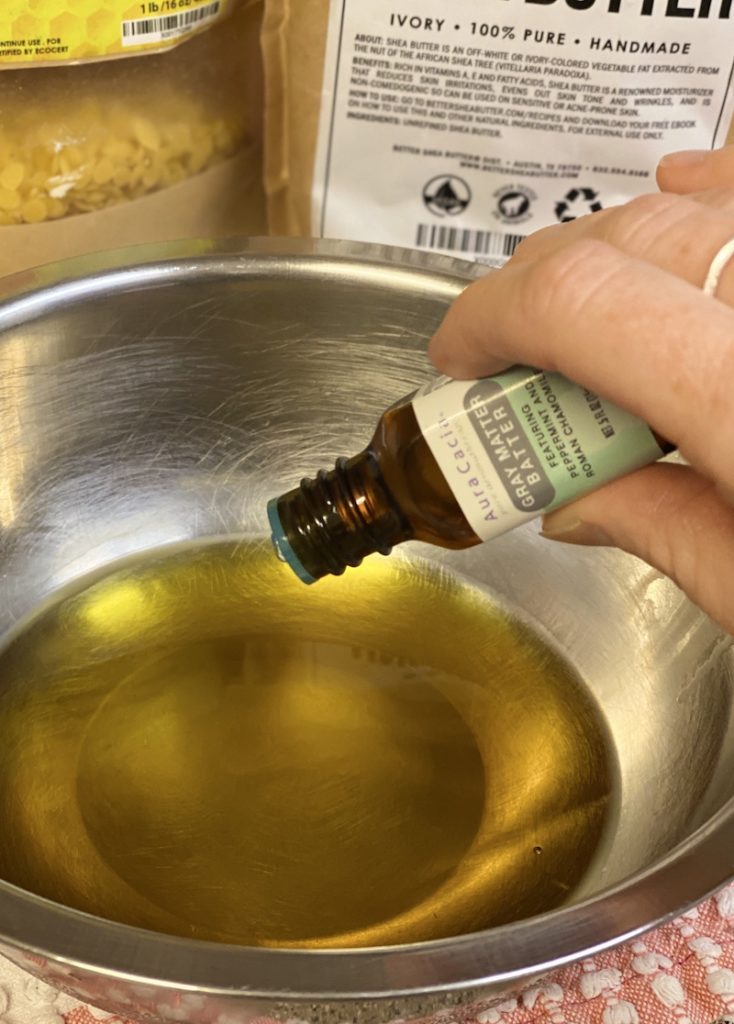
  • Optional: 1% dilution of Gray Matter Batter or Lavender essential oil (or other essential oils)

Tools

  • Small heatproof bowl and saucepan 
  • spatula or spoon
  • mold (soap mold, muffin tin, silicone candy/baking mold, etc)

Instructions

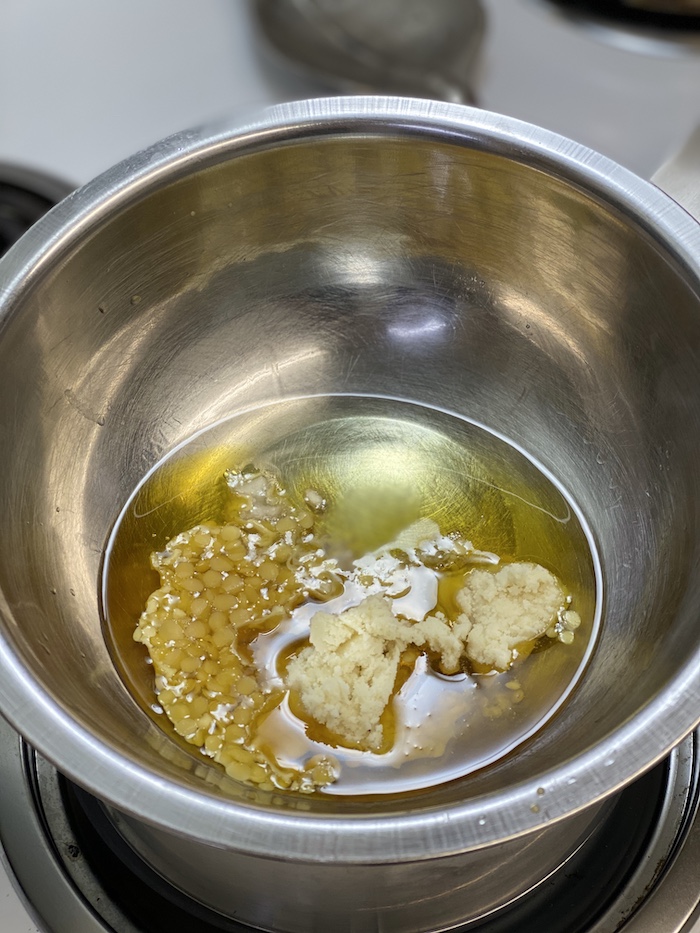
    1. Measure equal parts shea butter, coconut oil, and beeswax.  (I like to use the beeswax pellets for easier measuring and melting.) 
    2. Combine ingredients in a small heatproof bowl and place on top of a saucepan with an inch or two of water.  Heat on the stove at medium-low.
    3. Stir until oils and wax are completely melted and combined.  Remove from heat and allow to cool just slightly before adding essential oils, if using.  Stir to incorporate.
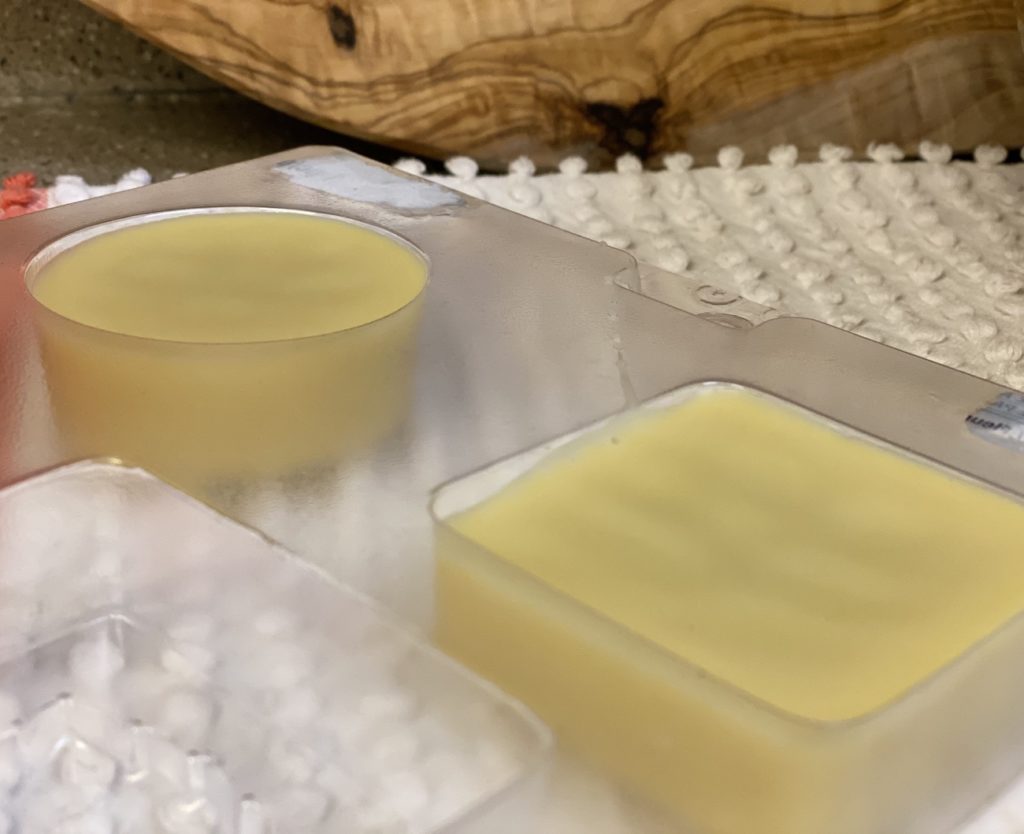
    4. Working quickly, pour the liquid mixture into your clean molds.  Allow them to sit undisturbed until the oils become opaque.  Now, either leave them overnight to completely harden, or place them in the fridge for an hour or two to set.
    5. When the bar is set, carefully pop them out of the mold!

Notes

To dilute essential oils to 1%:

Use 6 drops per 1 oz

Here is a very helpful chart for easier conversion.

2 thoughts on “Calming Lotion Bars”

  1. Pingback: Dairy-Free Hot Cocoa Mix • The Crunchy Ginger

  2. Pingback: Beeswax lotion, winter bees, & more mead – Barrington Bee

Leave a Comment

Your email address will not be published. Required fields are marked *

Skip to Instructions